Tuesday, October 30

Jumble words and stereogram

Aoccdrnig to rscheearch at Cmabrigde Uinervtisy, it deosn't mttaer in waht oredr the ltteers in a wrod are, the olny iprmoatnt tihng is taht the frist and lsat ltteer be at the rghit pclae. The rset can be a toatl mses and you can sitll raed it wouthit a porbelm. Tihs is bcuseae the huamn mnid deos not raed ervey lteter by istlef, but the wrod as a wlohe. source: http://www.eyetricks.com/wordjumble.htm

How many F's does the following passage contain?

Finished files are the result of years of scientific study combined with the experience of years...

click here for answer. source: http://www.eyetricks.com/fcount.htm


What is stereogram? A stereogram is an optical illusion of depth created from flat, two-dimensional image or images. Originally, stereogram referred to a pair of stereo images which could be viewed using stereoscope. Other types of stereograms include anaglyphs and autostereograms.


click here for answer.


Viewing Stereogram:

The hidden image is not on the surface of the monitor screen. To find the hidden image you must focus you eyes through the screen. Pretend that you are looking through the monitor to the distant background. This causes you to switch from "near point" to "far point" vision and will allow the hidden image to come into view.
  • Put your face close to the screen. Pretend to look through the monitor.
  • Now, very slowly move back from the screen and as you do so the image will come into view.
  • This may take several attempts.
  • Please be patient, and you will be rewarded with the hidden image.
For more eye catching stereogram.. visit http://www.magiceye.com

Wednesday, October 24

Tuesday, October 23

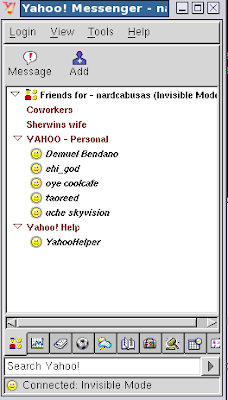
Howto: Installing Yahoo Messenger in Linux

RedHat Linux

  1. Save the appropriate file to your machine:
    RedHat 9
  2. Log in as root and type: rpm -i with the appropriate filename depending on your version to install the application.
  3. Run /usr/bin/ymessenger from X Window to launch the application.

Debian Linux

  1. Save the file to your machine.
  2. Log in as root and type: dpkg -i ymessenger_1.0.4_1_i386.deb to install the application.
  3. Run /usr/bin/ymessenger from X Window to launch the application.

FreeBSD Installation

  1. Save the file to your machine.
  2. Log in as root and type: pkg_add fbsd4.ymessenger.tgz to install the application.
  3. Run /usr/bin/ymessenger from X Window to launch the application.
file source: http://messenger.yahoo.com/unix.php

Installing aMSN Messenger Howto

A very nice MSN compatible messenger application, aMSN Messenger is a multiplatform MSN messenger clone. Works pretty much like its Windows based counterpart. Perfect for keeping in touch with those friends who have not yet seen the light. Works on linux well.

Linux Installation Howto:
1. Download the software http://sourceforge.net/projects/amsn/
2. Untar the package
e.g
sh amsn-0.97RC1-1.tcl84.x86.package

3. It will install all required dependecies like tcl, tk, tls, etc.. if error occured during installation, install the missing package using yum command.
3.1 #yum install tcl

3.2 #yum install tk
3.3 #yum install tls
4. Upon completed, run the aMSN messenger from AppMenu > Internet > aMSN.

aMSN messenger can support webcam as well and other features
much like the windows messenger.


Saturday, October 20

system info in linux

Linux comes with several good utilities for getting detailed information inside your linux box.
Commands like lspci, dmesg and /proc.

1. lspci -list all pci devices.

[root@rsc ~]#/sbin/lspci

00:00.0 Host bridge: Intel Corporation 82845G/GL[Brookdale-G]/GE/PE DRAM Controller/Host-Hub Interface (rev 03)
00:02.0 VGA compatible controller: Intel Corporation 82845G/GL[Brookdale-G]/GE Chipset Integrated Graphics Device (rev 03)
00:1d.0 USB Controller: Intel Corporation 82801DB/DBL/DBM (ICH4/ICH4-L/ICH4-M) USB UHCI Controller #1 (rev 02)
00:1d.1 USB Controller: Intel Corporation 82801DB/DBL/DBM (ICH4/ICH4-L/ICH4-M) USB UHCI Controller #2 (rev 02)
00:1d.7 USB Controller: Intel Corporation 82801DB/DBM (ICH4/ICH4-M) USB2 EHCI Controller (rev 02)
00:1e.0 PCI bridge: Intel Corporation 82801 PCI Bridge (rev 82)
00:1f.0 ISA bridge: Intel Corporation 82801DB/DBL (ICH4/ICH4-L) LPC Interface Bridge (rev 02)
00:1f.1 IDE interface: Intel Corporation 82801DB (ICH4) IDE Controller (rev 02)
00:1f.3 SMBus: Intel Corporation 82801DB/DBL/DBM (ICH4/ICH4-L/ICH4-M) SMBus Controller (rev 02)
00:1f.5 Multimedia audio controller: Intel Corporation 82801DB/DBL/DBM (ICH4/ICH4-L/ICH4-M) AC'97 Audio Controller (rev 02)
01:04.0 Multimedia audio controller: Creative Labs SB Live! EMU10k1 (rev 0a)
01:04.1 Input device controller: Creative Labs SB Live! Game Port (rev 0a)
01:06.0 Communication controller: Conexant Unknown device 2702 (rev 01)
01:09.0 Ethernet controller: Broadcom Corporation BCM4401 100Base-T (rev 01)
[root@rsc ~]#

Note:
Use the -v or -vv flags to display more information:

2. dmesg - print or control the kernel ring buffer
[root@rsc ~]# dmesg |grep -i cpu
Initializing CPU#0
CPU 0 irqstacks, hard=c079f000 soft=c077f000
CPU: After generic identify, caps: bfebfbff 00000000 00000000 00000000 00000400 00000000 00000000
CPU: Trace cache: 12K uops, L1 D cache: 8K
CPU: L2 cache: 512K
CPU: Hyper-Threading is disabled
CPU: After all inits, caps: bfebf3ff 00000000 00000000 00000080 00000400 00000000 00000000
Intel machine check reporting enabled on CPU#0.
CPU0: Intel P4/Xeon Extended MCE MSRs (12) available
CPU0: Intel(R) Pentium(R) 4 CPU 1.80GHz stepping 07
Brought up 1 CPUs
ACPI: Processor [CPU0] (supports 2 throttling states)

3. /proc - process information pseudo-filesystem
#cd /proc
#cat meminfo - memory information
#cat cpuinfo -
#cat partitions - show all partitions available
#cat swaps -show assign swap partition
#etc..

Glorietta2 Mall Blast in Manila


For the latest Philippine news stories and videos, visit GMANews.TV

http://www.gmanews.tv/video/13146/Scenes-at-Glorietta-2-mall-a-minute-after-blast

Wednesday, October 17

Fedora Linux Installation Howto

Fedora Installation (Screenshots)

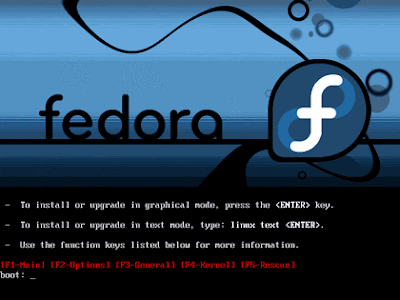
1. To get started, insert the first installation CD (or the DVD), and power on the machine. Assuming your system boots normally, the first screen you should see contains a couple of installation options. You can install Fedora in either graphical mode, or in text mode. Text mode is useful if your having trouble working with the your system's graphics adapter.
2.Regardless of which mode you choose for installation,the next screen is a text screen that asks if you want to test your CD
media before you install. If you have new disc,skip this section and click next. This test makes sure the installer will be able to read everything
it needs to properly install.
3. The graphical installation begins. Choose your language and click the Next button.
4.If you're using a new disk or want to format your hard disk. Answer Yes to initialize the disk. 5.Partitioning your drive, fedora provides a default layout which I have chosen for this installation. If you choose to remove partitions and create new ones, Anaconda pops up a warning that indicates that all data will be lost on the partitions you remove.
6. I've provided a screenshot that shows you the default disk layout for this operating system. In short,on this 16 GB disk, I have a 1 GB swap partition and a single 15 GB volume (named "/").
7. Use a boot loader for your new installation which is GRUB by default so that you can easily make changes the way your system boots especially in booting other operating systems if necessary.
8. If you want to manually provide TCP/IP addressing information, click the Edit button to bring up the window on which you can provide an address, subnet mask, gateway and dns address.
9. Select your time zone from the list.
10.Provide the password for the "root" user.
11.Choose what kind of software you want to make available on your new desktop system,for manual selection click "Customize now". This process can be done at any time, even after the initial installation of the system.
12. The formatting begins and immediately starts the process of installing the operating system and packages you've selected.
14. When installation done. Reboot the system and wait to boot GUI of your newly installed fedora. Good luck!

see screenshots below:


WINE (WINdows Emulator)

Wine is an Open Source implementation of the Windows API on top of X, OpenGL, and Unix.
Think of Wine as a compatibility layer for running Windows programs. Wine does not require Microsoft Windows, as it is a completely free alternative implementation of the Windows API consisting of 100% non-Microsoft code, however Wine can optionally use native Windows DLLs if they are available. Wine provides both a development toolkit for porting Windows source code to Unix as well as a program loader, allowing many unmodified Windows programs to run on x86-based Unixes, including Linux, FreeBSD, Mac OS X, and Solaris. For more... http://www.winehq.org/

One way of installing wine: using linux command prompt (root access)
1. #yum install wine* it will then install wine and all its required libraries
2. Wine has its own C:/ directory and program files to keep your installed software under
Menu > Wine > Wine File

Then, I followed the documentation on the site for configuring wine. http://www.winehq.org/docs/en/wineusr-guide.html#CONFIG-WINE-MAIN

see wine website for other detailed info.


RealPlayer on Linux

Download the current RealPLayer software for linux. http://www.real.com/linux/
To extract , run the following command. #sh realplayer10.bin
Install it using rpm command
e.g. #rpm -ivh
If you encounter problem with libraries, install the missing library by downloading the library manually or by using yum.
e.g. #yum install compat-libstdc++-33 or rpm -ivh
If succesfull, play realplay by creating a shortcut icon or via application menu.
#realplay & or create a shortcut on your desktop

Sunday, October 14

Installing Audio Player in Linux

XMMS is a multimedia player for unix systems. XMMS stands for X MultiMedia System and can play media files such as MP3, MOD's, WAV and others with the use of Input plugins. The easiest way to install xmms is by using yum (yellowdaog updter modified) command.

1. From your linux box type #yum install xmms xmms-mp3 xmms-skins
2. It will then fetch the xmms software from its repository database.
3. After installating, just run the software using command prompt
#xmms or #xmms & (play it on background)

better yet click linux Applicationm (Menu) then go to Sound and Video > Audio Player.
4. Try playing any mp3 or audio song.
5. If mp3 files cant be played, make sure that the xmms-mp3 package was installed.
6. type #rpm -qa |grep xmms

7. yum install xmms-mp3* or install it manullay base on yourlinux distro.
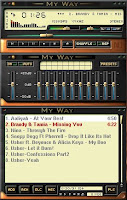
8. See screenshoots after successful install.


Installing xmms-skins after succesfull install


1. Goto www.xmms.org
2. Select desired xmms skin and save it to your computer. Extension of skins are in .zip .

3.Then copy the downloaded skins to xmms default directory.
#copy /usr/share/xmms/Skins/
4.Change the skins by right click Menu > Options > Skin Browser
5.Then its done!

Thursday, October 11

Klotski Brain Teaser Game

Klotski
Klotski is small brick game which has its root in a wooden game named (in french) "Ane rouge". The goal is to bring the red piece to its destination by moving other pieces. It sounds simple but it is a real brainteaser.
Try
Forget Me Not puzzle click here! GoodLuck!

It takes me days to figure out the solution. Try it yourself.


Chips Challenge

Chips challenge is a strategy game og moving blocks and make to the finish of each round.
Download it here!


Wednesday, October 10

ISO download

1. How to screenshoots using linux command:
Capturing screen is as easy as we all know. In linux just type a single command to do it.
import e.g. import screen1.jpg
Point the cross sign of your mouse to the screen you want to capture. :-)

2. Verifying md5sum iso
#md5sum -c linux.iso.md5

Creating md5sum iso using linux
#md5sum linux.iso > linux.iso.md5

3. To download a linux iso using wget
#wget http:///
e.g. donwloading fedora-7 dvd version.
wget http://fr2.rpmfind.net/linux/fedora/releases/7/Fedora/i386/iso/F-7-i386-DVD.iso

To download a linux iso using wget that has hot-linking protection
#wget --referer=http://www.mrbass.org http://www.mrbass.org/linux.iso

To resume a partially download file using wget
#wget -c --referer=http://www.mrbass.org http://www.mrbass.org/linux.iso


To download many linux iso images in queue using wget
#wget --referer=http://www.mrbass.org http://www.mrbass.org/linuxcd1.iso #http://www.mrbass.org/linuxcd2.iso http://www.mrbass.org/linuxcd3.iso


Mounting USB device in linux

How to mount a usb device in linux.
e.g. Digital Camera, USB flash drive, mobilephone

1. Connect the usb cable to your linux computer.
2. Login as root.
#su - or sudo
#
3. Then type
# tail -f /var/log/messages


* This will show you the device you have connected like sda1, hdc, etc...


4. Type the following
mount /dev/devicename /mnt/flash
e.g. #mount /dev/sda1 /mnt/flash

*Format: mount devicename devicedestination

5. #cd /mnt/flash

6. Walah... your done.


Unmount the usb device:
1. Go back to main prompt
2. Type umount /mnt/flash
e.g #umount /mnt/devicedestination

3. Remove your usb device.

Note: You can unmount the device while your inside /mnt/flash

Tuesday, October 9

100 Basic Linux Commands -part2

36. fsck - File system consistency check and repair
#fsck /var

37. ftp -File Transfer Protocol
#ftp ftp.tugraz.at

38. grep - Search file(s) for lines that match a given
#tail -f /var/log/maillog |grep yahoo.com

39. gzip - Compress or decompress named file(s)
#gzip testfile.txt
After gzip command filename is testfile.txt.gz
How to extract gzip?
#gunzip testfile.txt.gz

40. halt -Stop the system, Halt, reboot, poweroff
#halt

41. history -Command History, List your previous commands
#history
#history |grep ftp

42. hostname -Print or set system name
#hostname <hostname>
#hostname rsc

43. id -Print user's identity
#id ronald

44. ifconfig -Configure a network
#ifconfig eth0 192.168.0.1 netmask 255.255.255.0

45. ipaddr -Lists all your inet address details
#ipaddr
1: lo: mtu 16436 qdisc noqueue
link/loopback 00:00:00:00:00:00 brd 00:00:00:00:00:00
inet 127.0.0.1/8 scope host lo
inet6 ::1/128 scope host
valid_lft forever preferred_lft forever
2: eth0: mtu 1500 qdisc pfifo_fast qlen 1000
link/ether 00:08:74:c5:c0:14 brd ff:ff:ff:ff:ff:ff
inet 83.129.4.30/27 brd 83.129.4.31 scope global eth0
inet 192.168.60.1/24 brd 192.168.60.255 scope global eth0:1
inet 84.229.6.107/28 brd 84.229.6.111 scope global eth0:2
inet 192.168.1.1/24 brd 192.168.1.255 scope global eth0:3
inet6 fe80::208:74ff:fec5:c014/64 scope link
valid_lft forever preferred_lft forever
3: sit0: mtu 1480 qdisc noop
link/sit 0.0.0.0 brd 0.0.0.0

46. kill -Stop a process from runnin
#kill spamd
#kill -9
#kill -9 26711

47. less -Display output one screen at a
#less
#less /etc/named.conf

48. links -lynx-like alternative character mode WWW browser
#links www.google.com

49. local - Create variables
* can only be used in a function

50. locate -Find files
#locate squid
#locate *.doc

51.logout -Exit a login shell
#logout

52. logrotate - Rotates, compresses, and mails system logs
*rotate mail system logs and dependent to /etc/logrotate.d/

53. lpr -Off line print files

54. ls -List information about file(s)
#ls -al /home
#ls -halt /var
*list /var sorted by date.

55. make -Recompile a group of programs
*is used to maintain programs.

56. man -Help manual
#man ls
#man tail

57. mkdir -Create new folder(s)
#mkdir testfolder

58. mktemp -Make temporary filename (unique)
#mknod testfile

59. more -Display output one screen at a time
#more testfile

60. mount -Mount a file system
#mount /dev/sda1 /mnt/usbflash
#mount /home

61. mv -Move or rename files or directories
#mv testfile testfile1
#mv rondir /var/

62. nslookup -Query Internet name servers interactively
[root@rsc var]# nslookup
> set type=mx
> yahoo.com
Server: 83.229.64.10
Address: 83.229.64.10#53

Non-authoritative answer:
yahoo.com mail exchanger = 1 e.mx.mail.yahoo.com.
yahoo.com mail exchanger = 1 f.mx.mail.yahoo.com.
yahoo.com mail exchanger = 1 g.mx.mail.yahoo.com.
yahoo.com mail exchanger = 1 a.mx.mail.yahoo.com.
yahoo.com mail exchanger = 1 b.mx.mail.yahoo.com.
yahoo.com mail exchanger = 1 c.mx.mail.yahoo.com.
yahoo.com mail exchanger = 1 d.mx.mail.yahoo.com.

Authoritative answers can be found from:
yahoo.com nameserver = ns3.yahoo.com.
yahoo.com nameserver = ns4.yahoo.com.
yahoo.com nameserver = ns5.yahoo.com.
yahoo.com nameserver = ns6.yahoo.com.
yahoo.com nameserver = ns8.yahoo.com.
yahoo.com nameserver = ns1.yahoo.com.
yahoo.com nameserver = ns2.yahoo.com.
ns1.yahoo.com internet address = 66.218.71.63
ns2.yahoo.com internet address = 68.142.255.16
ns3.yahoo.com internet address = 217.12.4.104
ns4.yahoo.com internet address = 68.142.196.63
ns5.yahoo.com internet address = 216.109.116.17
ns6.yahoo.com internet address = 202.43.223.170
ns8.yahoo.com internet address = 202.165.104.22
>exit

63. passwd -Modify a user password
[root@rsc var]# passwd rcabusas
Changing password for user rcabusas.
New UNIX password:
BAD PASSWORD: it is WAY too short
Retype new UNIX password:
passwd: all authentication tokens updated successfully.

64. paste -Merge lines of files
#cat num1
1
2
#cat let2
a
b
c
#paste num1 let2
1 a
2 b
c

65. chage -Change user password expiry information
#chage -E YYYY-MM-DD
#chage -E 2008-01-01 rsc

66. ping -Test a network connection
#ping yahoo.com
#ping 198.6.1.2

67. ps -Process status
PID TTY STAT TIME COMMAND
1 ? Ss 0:02 init [5]
2 ? S 0:00 [migration/0]
3 ? SN 0:00 [ksoftirqd/0]
4 ? S 0:00 [watchdog/0]
5 ? S<>
6 ? S<>
7 ? S<>
10 ? S<>
11 ? S<>
1455 ? S<>
1908 ? Ss 0:09 syslogd -m 0
1911 ? Ss 0:00 klogd -x
1942 ? Ssl 0:00 /usr/sbin/named -u named -c /etc/named.caching-nameserver.conf -t /var/named/chroot

68.pwd -Print Working Directory
[root@rsc html]# pwd
/var/www/html

69.quota -Display disk usage and limits
70. quotacheck -Scan a file system for disk usage
*quota must be turn on to used its function

72. rm -Remove files
#rm -rf /home
#rm testfile

73. scp -Secure copy (remote file copy)
#scp projects.doc ron@192.168.1.1:
*projects.doc will becopied to /home/ron folder of 192.168.1.1 host.

74. shutdown -Shutdown or restart linux
#shutdown -h now (halt)
#shutdown -r now (reboot)

75. sort -sort lines text files
#sort testfile
*testfile alphabetically sorted

76. lynx -Command line browser
#lynx www.yahoo.com

77. touch -Create file timestamps
#touch testfilename
*same function as mktemp

78. usermod - modify a user account
#usermod -d /home/new/ron ron

79. useradd - create a new user or update default new user information
#useradd -d /home/user1 -C "User 1 Directory" user1

80. userdel - delete a user account and related files
#userdel -r user1
*it will delete all info associated with user1


Monday, October 8

100 Basic Linux Commands -part1

1. alias Create an alias
2. awk Find and Replace text, database sort/validate/index
3. cal Display a calendar
4. cat Display the contents of a file
5. cd Change Directory
6. cfdisk Partition table manipulator for Linux
7. chgrp Change group ownership
8. chmod Change access permissions
9. chown Change file owner and group
10. chroot Run a command with a different root directory
11. cksum Print CRC checksum and byte counts
12. clear Clear terminal screen
13.
cmp Compare two files
14.
cp Copy one or more files to another location
15. cron Daemon to execute scheduled commands
16. crontab Schedule a command to run at a later
17. cut Divide a file into several parts
18. date Display or change the date & time
19. dc Desk Calculator
20. dd Data Dump - Convert and copy a file
21. df Display free disk space
22. diff Display the differences between two files
23. dig DNS lookup
24. dir Briefly list directory contents
25. dirs Display list of remembered directories
26. du Estimate file space usage
27. echo Display message on screen
28. egrep Search file(s) for lines that match an extended expression
29. fdformat Low-level format a floppy disk
30. fdisk Partition table manipulator for Linux
32. fgrep Search file(s) for lines that match a fixed stringfile
33. find Search for files that meet a desired criteria
34. format Format disks or tapes
35. free Display memory usage

Setting Up Internet Connection Sharing

To enable Internet Connection Sharing on a network connection You must be logged on to your computer with an owner account in order to complete this procedure.
1. Open Network Connections. (Click Start, click Control Panel, and then double–click Network Connections.)
Click the dial–up, local area network, PPPoE, or VPN connection you want to share, and then, under Network Tasks, click Change settings of this connection.

2.On the Advanced tab, select the Allow other network users to connect through this computer's Internet connection check box. If you want this connection to dial automatically when another computer on your home or small office network attempts to access external resources, select the Establish a dial–up connection whenever a computer on my network attempts to access the Internet check box.
3. If you want other network users to enable or disable the shared Internet connection, select the Allow other network users to control or disable the shared Internet connection check box.
4. Under Internet Connection Sharing, in Home networking connection, select any adapter that connects the computer sharing its Internet connection to the other computers on your network. The Home networking connection is only present when two or more network adapters are installed on the computer.
5. To configure Internet options on your client computers for Internet Connection Sharing Open Internet Explorer. Click Start, point to All Programs, and then click Internet Explorer.)
On the Tools menu, click Internet Options.

6. On the Connections tab, click Never dial a connection, and then click LAN Settings. In Automatic configuration, clear the Automatically detect settings and Use automatic configuration script check boxes.
7. In Proxy Server, clear the Use a proxy server check box.