Showing posts with label Linux Command. Show all posts
Showing posts with label Linux Command. Show all posts
Wednesday, December 19
Mounting Floppy Disks and Removable Media
In order to read floppy disks and other removable media, you need to mount the device. Linux usually adds the proper settings to /etc/fstab and default mount points to the /mnt directory.
The defaul mount points are straightforward; for example, floppy are mounted on /mnt/floppy, CD's are mounted on /mnt/cdrom. You can do this using the following command:
#mount -t vfat /dev/fd0 /mnt/floppy
the -t switch specifies the type of filesystem(vfat). The device file /dev/fd0 represents the first floppy drive; /mnt/floppy is the directory through which you can access the files after mounting.
If you take a look at your /etc/fstab entry and you will see something like the ff:
/dev/fd0 /mnt/floppy auto noauto,owner,kudzu 0 0
This /etc/fstab line sets the default configuration for he first floppy drive (/dev/fd0). The ormat is auto which means that the mount command searches the filesystems and so all you need to mount the floppy is he following command:
#mount /dev/fd0 /mnt/floppy
Similarly, the device for your CD-ROM is normally /dev/cdrom. To mount an ISO9660 CD-ROM, run he command:
#mount -rt iso9660 /dev/cdrom /mnt/cdrom
Now you can read he contents of /mnt/cdrom or /mnt/floppy as if it were a normal filesystem on your system. You don't have to use /mnt/floppy or /mnt/cdrom directories rather you can use any available empty directory of your choice.
You can add the cd-rom entry on your /etc/fstab config file just like this:
/dev/cdrom /mnt/cdrom udf,iso9660 noauto,owner,kudzu,ro 0 0
Asyou can see, iso9660 is already specified as the default CD filesystem and CD's are mounted as read-only(ro) by default. Therefore, all you need to command in mounting the CD is either one of the following:
#mount /mnt/cdrom
#mount /dev/cdrom
To unmount floppy or cdrom, use the umount command:
#umount /mnt/floppy
#umount /mnt/cdrom
Take note that it is imprtant to unmount floppy disk before removing them. Otherwise, you may lose the data which might still be in he cache.


Tuesday, December 18
Restricting User's Login
When we talk about forcing a user to log off, what we’re really talking about is time restrictions on certain account system access and services. The easiest way I’ve found to implement time restrictions is by using software called Linux-PAM.
Pluggable Authentication Module (PAM) is a mechanism for authenticating users. Specifically, we’re going to use the pam_time module to control timed access for users to services.
Using the pam_time module, we can set access restrictions to a system and/or specific applications at various times of the day as well as on specific days. Depending on the configuration, you can use this module to deny access to individual users based on their name, the time of day, the day of week, the service they’re applying for, and their terminal from which they’re making the request.
When using pam_time, you must terminate the syntax or rule in the /etc/security/time.conf file with a newline.
Always remeber that pound sign [#] is a comment and the system will ignore that text inline to it.
This is an example configuration file for the pam_time module.
Its syntax was initially based heavily on that of the shadow package (shadow-960129).
The syntax of the lines is as follows:
services;ttys;users;times
- The first field — services = list of PAM service names.
- The second field — tty =logic list of terminal names.
- The third field — user = is a logic list of users or a netgroup of users.
- The fourth field — times =indicates the applicable times.
Here’s an example of a typical set of rules:
login ; * ; !ron ; MoTuWeThFr0800-2000
login ; * ; !root ; !Al0000-2400
http ; * ; !ron ; MoTuWeThFr0800-2000
http ; * ; !root; !Al0000-2400
ftp ; * ; !ron ; MoTuWeThFr0800-2000
ftp ; * ; !root; !Al0000-2400

These rules restrict user ron from logging on between the hours of 0800 and 2000, and they also restrict http and ftp access during these hours.

Root would be able to logon at any time and browse the Internet during all times as well.
Monday, November 12
SSH Howto Tips
**X Forwarding over SSH
To run GUI programs on one machine using another machine, We can use X forwarding by connecting using ssh -X user@remotecomputer and once logged in running the command to start the GUI app, the GUI window will open on the local machine. X11Forwarding must be enabled in the file /etc/ssh/sshd_config which is usually set by default.
To speed things up -Y (Trusted X11Forwarding) or -C (compression) can be used instead of -X.
X11Forwarding is also applicable accessing windows computer via linux system using rdesktop (remote desktop).
e.g. #ssh -Y user@remotehost rdesktop remotecomputer
where remotehost is a linux server and remotecomputer(windowsPC) can be access via linux server only.
**Automatic SSH login without password
SSH is a secure clone of RSH with RSA encryption based authentication. This article tells you how to use ssh without having to type in your password every time you use 'ssh'.
First, generate your public/private keys using ssh-keygen
#ssh-keygen - This will generate 'identity' and 'identity. pub' in the .ssh directory in your home directory.
#ssh-keygen -t rsa -This will generate 'id_rsa' and 'id_rsa.pub' in the .ssh directory in your home directory.
When asked, just press enter for safety. Goto directory where you generate your ssh key. Usually, ~user/.ssh/
Second, Copy the *.pub file to the .ssh directory of the remote host using scp command.
[root@ron .ssh]#scp filename.pub ron1@remotehost:/home/ron1/.ssh/
Under ron1:
#cd /home/ron1/.ssh
[root@ron1 .ssh]#touch authorized_keys
[root@ron1 .ssh]#cat filename.pub > authorized_keys
To append ssh key type:
(Use for setting up multiple access keys.)
[root@ron1 .ssh]#cat filename.pub >> authorized_keys
Finally, you can try ssh without entering password and Viola!
#ssh ron1@remotehost or simply
#ssh remotehost
**Runing Commands Over SSH
Sometimes you don't really want to run a shell like Bash on the host you are connecting to. Maybe you just want to run a command and exit. This is easy to accomplished by putting the command you wish to run at the end of your ssh connection command.
#ssh user@remotehost ls -l /home
#ssh user@remotehost less /etc/hosts.allow
**Keeping your SSH session alive
Keeping your SSH session up and idle is sometimes a problem. For whatever reason, the connection dies at X minutes of inactivity. Usually this happens because there is a firewall between you and the internet that is configured to only keep stateful connections.
Fortunately, in recent versions of OpenSSH, there is a fix for this problem. Simply put in your sshd_config file the following:
Host *
Protocol 2
TCPKeepAlive yes
ServerAliveInterval 60
**Allow only specific users to log in via SSH
You should not permit root logins via SSH, this is a big and unnecessary security risk. If an attacker gains root login for your system, he can do more damage than if he gains normal user login. Configure SSH server so that root user is not allowed to log in. Find the line that says:
PermitRootLogin yes
Change yes to no and restart the service. You can then log in with any defined user and switch to user root if you want to become a superuser.
It is wise to create a dummy local user with absolutely no rights on the system and use that user to login into SSH. That way no harm can be done if the user account is compromised. You can specify certain users who you want to have access by editing your sshd_config file.
At the end of sshd_config file I would add a line like this:
AllowUsers ron hannah jean
Allowing only specific hosts using tcp wrappers
You can allow only specific hosts on a network to be able to connect to your SSH service, but you don't want to use or mess up your iptables configuration. Instead, you can use TCP wrappers, in this case the sshd TCP wrapper.
By default TCP wrappers first look in the /etc/hosts.deny file to see what hosts are denied for what service. Next, TCP wrapper looks in /etc/hosts.allow file to see if there are any rules that would allow hosts to connect to a specific service. Edit your /etc/hosts.deny using your favorite editor. For me, I always use vi editor.
#vi /etc/hosts.deny
sshd: ALL
This means that by default all hosts are forbidden to access the SSH service. This needs to be here, otherwise all hosts would have access to the SSH service, since TCP wrappers first looks into hosts.deny file and if there is no rule regarding blocking SSH service, any host can connect.
Next, create a rule in /etc/hosts.allow to allow only specific hosts to use the SSH service. Let say, local subnet 192.168.1.0/24 or specific IP 192.100.1.2. Only hosts specified below can access the ssh service.
#vi /etc/hosts.allow then add:
sshd: 192.168.1 192.100.1.2
All other hosts are disconnected before they even get to the login prompt, and receive an error like this:
ssh_exchange_identification: Connection closed by remote host
@If you found this article informative, you may be interested on the black square window above related to this post. You can also leave comments or subscribe.
To run GUI programs on one machine using another machine, We can use X forwarding by connecting using ssh -X user@remotecomputer and once logged in running the command to start the GUI app, the GUI window will open on the local machine. X11Forwarding must be enabled in the file /etc/ssh/sshd_config which is usually set by default.
To speed things up -Y (Trusted X11Forwarding) or -C (compression) can be used instead of -X.
X11Forwarding is also applicable accessing windows computer via linux system using rdesktop (remote desktop).
e.g. #ssh -Y user@remotehost rdesktop remotecomputer
where remotehost is a linux server and remotecomputer(windowsPC) can be access via linux server only.
**Automatic SSH login without password
SSH is a secure clone of RSH with RSA encryption based authentication. This article tells you how to use ssh without having to type in your password every time you use 'ssh'.
First, generate your public/private keys using ssh-keygen
#ssh-keygen - This will generate 'identity' and 'identity. pub' in the .ssh directory in your home directory.
#ssh-keygen -t rsa -This will generate 'id_rsa' and 'id_rsa.pub' in the .ssh directory in your home directory.
When asked, just press enter for safety. Goto directory where you generate your ssh key. Usually, ~user/.ssh/
Second, Copy the *.pub file to the .ssh directory of the remote host using scp command.
[root@ron .ssh]#scp filename.pub ron1@remotehost:/home/ron1/.ssh/
Under ron1:
#cd /home/ron1/.ssh
[root@ron1 .ssh]#touch authorized_keys
[root@ron1 .ssh]#cat filename.pub > authorized_keys
To append ssh key type:
(Use for setting up multiple access keys.)
[root@ron1 .ssh]#cat filename.pub >> authorized_keys
Finally, you can try ssh without entering password and Viola!
#ssh ron1@remotehost or simply
#ssh remotehost
**Runing Commands Over SSH
Sometimes you don't really want to run a shell like Bash on the host you are connecting to. Maybe you just want to run a command and exit. This is easy to accomplished by putting the command you wish to run at the end of your ssh connection command.
#ssh user@remotehost ls -l /home
#ssh user@remotehost less /etc/hosts.allow
**Keeping your SSH session alive
Keeping your SSH session up and idle is sometimes a problem. For whatever reason, the connection dies at X minutes of inactivity. Usually this happens because there is a firewall between you and the internet that is configured to only keep stateful connections.
Fortunately, in recent versions of OpenSSH, there is a fix for this problem. Simply put in your sshd_config file the following:
Host *
Protocol 2
TCPKeepAlive yes
ServerAliveInterval 60
**Allow only specific users to log in via SSH
You should not permit root logins via SSH, this is a big and unnecessary security risk. If an attacker gains root login for your system, he can do more damage than if he gains normal user login. Configure SSH server so that root user is not allowed to log in. Find the line that says:
PermitRootLogin yes
Change yes to no and restart the service. You can then log in with any defined user and switch to user root if you want to become a superuser.
It is wise to create a dummy local user with absolutely no rights on the system and use that user to login into SSH. That way no harm can be done if the user account is compromised. You can specify certain users who you want to have access by editing your sshd_config file.
At the end of sshd_config file I would add a line like this:
AllowUsers ron hannah jean
Allowing only specific hosts using tcp wrappers
You can allow only specific hosts on a network to be able to connect to your SSH service, but you don't want to use or mess up your iptables configuration. Instead, you can use TCP wrappers, in this case the sshd TCP wrapper.
By default TCP wrappers first look in the /etc/hosts.deny file to see what hosts are denied for what service. Next, TCP wrapper looks in /etc/hosts.allow file to see if there are any rules that would allow hosts to connect to a specific service. Edit your /etc/hosts.deny using your favorite editor. For me, I always use vi editor.
#vi /etc/hosts.deny
sshd: ALL
This means that by default all hosts are forbidden to access the SSH service. This needs to be here, otherwise all hosts would have access to the SSH service, since TCP wrappers first looks into hosts.deny file and if there is no rule regarding blocking SSH service, any host can connect.
Next, create a rule in /etc/hosts.allow to allow only specific hosts to use the SSH service. Let say, local subnet 192.168.1.0/24 or specific IP 192.100.1.2. Only hosts specified below can access the ssh service.
#vi /etc/hosts.allow then add:
sshd: 192.168.1 192.100.1.2
All other hosts are disconnected before they even get to the login prompt, and receive an error like this:
ssh_exchange_identification: Connection closed by remote host
@If you found this article informative, you may be interested on the black square window above related to this post. You can also leave comments or subscribe.
Wednesday, October 24
Tips for New Bloggers: Flash Music Player and Music Playlists
Tips for New Bloggers: Flash Music Player and Music Playlists
*this blogsite is one of the best tips and tutorials specially for new blog comers on its way.
*this blogsite is one of the best tips and tutorials specially for new blog comers on its way.
Tuesday, October 23
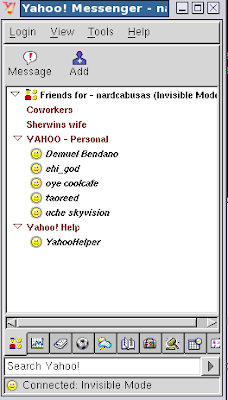
Howto: Installing Yahoo Messenger in Linux
RedHat Linux
- Save the appropriate file to your machine:
RedHat 9
- Log in as root and type: rpm -i
with the appropriate filename depending on your version to install the application. - Run /usr/bin/ymessenger from X Window to launch the application.
Debian Linux
- Save the file to your machine.
- Log in as root and type: dpkg -i ymessenger_1.0.4_1_i386.deb to install the application.
- Run /usr/bin/ymessenger from X Window to launch the application.
FreeBSD Installation
- Save the file to your machine.
- Log in as root and type: pkg_add fbsd4.ymessenger.tgz to install the application.
- Run /usr/bin/ymessenger from X Window to launch the application.
Wednesday, October 10
ISO download
1. How to screenshoots using linux command:
Capturing screen is as easy as we all know. In linux just type a single command to do it.
import e.g. import screen1.jpg
Point the cross sign of your mouse to the screen you want to capture. :-)
2. Verifying md5sum iso
#md5sum -c linux.iso.md5
#wget http:///
e.g. donwloading fedora-7 dvd version.
wget http://fr2.rpmfind.net/linux/fedora/releases/7/Fedora/i386/iso/F-7-i386-DVD.iso
To download a linux iso using wget that has hot-linking protection
#wget --referer=http://www.mrbass.org http://www.mrbass.org/linux.iso
To download many linux iso images in queue using wget
#wget --referer=http://www.mrbass.org http://www.mrbass.org/linuxcd1.iso #http://www.mrbass.org/linuxcd2.iso http://www.mrbass.org/linuxcd3.iso
Capturing screen is as easy as we all know. In linux just type a single command to do it.
import
Point the cross sign of your mouse to the screen you want to capture. :-)
2. Verifying md5sum iso
#md5sum -c linux.iso.md5
Creating md5sum iso using linux
#md5sum linux.iso > linux.iso.md5
#wget http://
e.g. donwloading fedora-7 dvd version.
wget http://fr2.rpmfind.net/linux/fedora/releases/7/Fedora/i386/iso/F-7-i386-DVD.iso
#wget --referer=http://www.mrbass.org http://www.mrbass.org/linux.iso
To resume a partially download file using wget
#wget -c --referer=http://www.mrbass.org http://www.mrbass.org/linux.iso
To download many linux iso images in queue using wget
#wget --referer=http://www.mrbass.org http://www.mrbass.org/linuxcd1.iso #http://www.mrbass.org/linuxcd2.iso http://www.mrbass.org/linuxcd3.iso
Mounting USB device in linux
How to mount a usb device in linux.
e.g. Digital Camera, USB flash drive, mobilephone
1. Connect the usb cable to your linux computer.
2. Login as root.
#su - or sudo
#
3. Then type
# tail -f /var/log/messages
* This will show you the device you have connected like sda1, hdc, etc...
4. Type the following
mount /dev/devicename /mnt/flash
e.g. #mount /dev/sda1 /mnt/flash
*Format: mount devicename devicedestination
5. #cd /mnt/flash
6. Walah... your done.
Unmount the usb device:
1. Go back to main prompt
2. Type umount /mnt/flash
e.g #umount /mnt/devicedestination
3. Remove your usb device.
Note: You can unmount the device while your inside /mnt/flash
e.g. Digital Camera, USB flash drive, mobilephone
1. Connect the usb cable to your linux computer.
2. Login as root.
#su - or sudo
#
3. Then type
# tail -f /var/log/messages
* This will show you the device you have connected like sda1, hdc, etc...
4. Type the following
mount /dev/devicename /mnt/flash
e.g. #mount /dev/sda1 /mnt/flash
*Format: mount devicename devicedestination
5. #cd /mnt/flash
6. Walah... your done.
Unmount the usb device:
1. Go back to main prompt
2. Type umount /mnt/flash
e.g #umount /mnt/devicedestination
3. Remove your usb device.
Note: You can unmount the device while your inside /mnt/flash
Tuesday, October 9
100 Basic Linux Commands -part2
36. fsck - File system consistency check and repair
#fsck /var
37. ftp -File Transfer Protocol
#ftp ftp.tugraz.at
38. grep - Search file(s) for lines that match a given
#tail -f /var/log/maillog |grep yahoo.com
39. gzip - Compress or decompress named file(s)
#gzip testfile.txt
After gzip command filename is testfile.txt.gz
How to extract gzip?
#gunzip testfile.txt.gz
40. halt -Stop the system, Halt, reboot, poweroff
#halt
41. history -Command History, List your previous commands
#history
#history |grep ftp
42. hostname -Print or set system name
#hostname <hostname>
#hostname rsc
43. id -Print user's identity
#id ronald
44. ifconfig -Configure a network
#ifconfig eth0 192.168.0.1 netmask 255.255.255.0
45. ipaddr -Lists all your inet address details
#ipaddr
1: lo: mtu 16436 qdisc noqueue
link/loopback 00:00:00:00:00:00 brd 00:00:00:00:00:00
inet 127.0.0.1/8 scope host lo
inet6 ::1/128 scope host
valid_lft forever preferred_lft forever
2: eth0: mtu 1500 qdisc pfifo_fast qlen 1000
link/ether 00:08:74:c5:c0:14 brd ff:ff:ff:ff:ff:ff
inet 83.129.4.30/27 brd 83.129.4.31 scope global eth0
inet 192.168.60.1/24 brd 192.168.60.255 scope global eth0:1
inet 84.229.6.107/28 brd 84.229.6.111 scope global eth0:2
inet 192.168.1.1/24 brd 192.168.1.255 scope global eth0:3
inet6 fe80::208:74ff:fec5:c014/64 scope link
valid_lft forever preferred_lft forever
3: sit0: mtu 1480 qdisc noop
link/sit 0.0.0.0 brd 0.0.0.0
46. kill -Stop a process from runnin
#kill spamd
#kill -9
#kill -9 26711
47. less -Display output one screen at a
#less
#less /etc/named.conf
48. links -lynx-like alternative character mode WWW browser
#links www.google.com
49. local - Create variables
* can only be used in a function
50. locate -Find files
#locate squid
#locate *.doc
51.logout -Exit a login shell
#logout
52. logrotate - Rotates, compresses, and mails system logs
*rotate mail system logs and dependent to /etc/logrotate.d/
53. lpr -Off line print files
54. ls -List information about file(s)
#ls -al /home
#ls -halt /var
*list /var sorted by date.
55. make -Recompile a group of programs
*is used to maintain programs.
56. man -Help manual
#man ls
#man tail
57. mkdir -Create new folder(s)
#mkdir testfolder
58. mktemp -Make temporary filename (unique)
#mknod testfile
59. more -Display output one screen at a time
#more testfile
60. mount -Mount a file system
#mount /dev/sda1 /mnt/usbflash
#mount /home
61. mv -Move or rename files or directories
#mv testfile testfile1
#mv rondir /var/
62. nslookup -Query Internet name servers interactively
[root@rsc var]# nslookup
> set type=mx
> yahoo.com
Server: 83.229.64.10
Address: 83.229.64.10#53
Non-authoritative answer:
yahoo.com mail exchanger = 1 e.mx.mail.yahoo.com.
yahoo.com mail exchanger = 1 f.mx.mail.yahoo.com.
yahoo.com mail exchanger = 1 g.mx.mail.yahoo.com.
yahoo.com mail exchanger = 1 a.mx.mail.yahoo.com.
yahoo.com mail exchanger = 1 b.mx.mail.yahoo.com.
yahoo.com mail exchanger = 1 c.mx.mail.yahoo.com.
yahoo.com mail exchanger = 1 d.mx.mail.yahoo.com.
Authoritative answers can be found from:
yahoo.com nameserver = ns3.yahoo.com.
yahoo.com nameserver = ns4.yahoo.com.
yahoo.com nameserver = ns5.yahoo.com.
yahoo.com nameserver = ns6.yahoo.com.
yahoo.com nameserver = ns8.yahoo.com.
yahoo.com nameserver = ns1.yahoo.com.
yahoo.com nameserver = ns2.yahoo.com.
ns1.yahoo.com internet address = 66.218.71.63
ns2.yahoo.com internet address = 68.142.255.16
ns3.yahoo.com internet address = 217.12.4.104
ns4.yahoo.com internet address = 68.142.196.63
ns5.yahoo.com internet address = 216.109.116.17
ns6.yahoo.com internet address = 202.43.223.170
ns8.yahoo.com internet address = 202.165.104.22
>exit
63. passwd -Modify a user password
[root@rsc var]# passwd rcabusas
Changing password for user rcabusas.
New UNIX password:
BAD PASSWORD: it is WAY too short
Retype new UNIX password:
passwd: all authentication tokens updated successfully.
64. paste -Merge lines of files
#cat num1
1
2
#cat let2
a
b
c
#paste num1 let2
1 a
2 b
c
65. chage -Change user password expiry information
#chage -E YYYY-MM-DD
#chage -E 2008-01-01 rsc
66. ping -Test a network connection
#ping yahoo.com
#ping 198.6.1.2
67. ps -Process status
PID TTY STAT TIME COMMAND
1 ? Ss 0:02 init [5]
2 ? S 0:00 [migration/0]
3 ? SN 0:00 [ksoftirqd/0]
4 ? S 0:00 [watchdog/0]
5 ? S<>
6 ? S<>
7 ? S<>
10 ? S<>
11 ? S<>
1455 ? S<>
1908 ? Ss 0:09 syslogd -m 0
1911 ? Ss 0:00 klogd -x
1942 ? Ssl 0:00 /usr/sbin/named -u named -c /etc/named.caching-nameserver.conf -t /var/named/chroot
68.pwd -Print Working Directory
[root@rsc html]# pwd
/var/www/html
69.quota -Display disk usage and limits
70. quotacheck -Scan a file system for disk usage
*quota must be turn on to used its function
72. rm -Remove files
#rm -rf /home
#rm testfile
73. scp -Secure copy (remote file copy)
#scp projects.doc ron@192.168.1.1:
*projects.doc will becopied to /home/ron folder of 192.168.1.1 host.
74. shutdown -Shutdown or restart linux
#shutdown -h now (halt)
#shutdown -r now (reboot)
75. sort -sort lines text files
#sort testfile
*testfile alphabetically sorted
76. lynx -Command line browser
#lynx www.yahoo.com
77. touch -Create file timestamps
#touch testfilename
*same function as mktemp
78. usermod - modify a user account
#usermod -d /home/new/ron ron
79. useradd - create a new user or update default new user information
#useradd -d /home/user1 -C "User 1 Directory" user1
80. userdel - delete a user account and related files
#userdel -r user1
*it will delete all info associated with user1
#fsck /var
37. ftp -File Transfer Protocol
#ftp ftp.tugraz.at
38. grep - Search file(s) for lines that match a given
#tail -f /var/log/maillog |grep yahoo.com
39. gzip - Compress or decompress named file(s)
#gzip testfile.txt
After gzip command filename is testfile.txt.gz
How to extract gzip?
#gunzip testfile.txt.gz
40. halt -Stop the system, Halt, reboot, poweroff
#halt
41. history -Command History, List your previous commands
#history
#history |grep ftp
42. hostname -Print or set system name
#hostname <hostname>
#hostname rsc
43. id -Print user's identity
#id ronald
44. ifconfig -Configure a network
#ifconfig eth0 192.168.0.1 netmask 255.255.255.0
45. ipaddr -Lists all your inet address details
#ipaddr
1: lo:
link/loopback 00:00:00:00:00:00 brd 00:00:00:00:00:00
inet 127.0.0.1/8 scope host lo
inet6 ::1/128 scope host
valid_lft forever preferred_lft forever
2: eth0:
link/ether 00:08:74:c5:c0:14 brd ff:ff:ff:ff:ff:ff
inet 83.129.4.30/27 brd 83.129.4.31 scope global eth0
inet 192.168.60.1/24 brd 192.168.60.255 scope global eth0:1
inet 84.229.6.107/28 brd 84.229.6.111 scope global eth0:2
inet 192.168.1.1/24 brd 192.168.1.255 scope global eth0:3
inet6 fe80::208:74ff:fec5:c014/64 scope link
valid_lft forever preferred_lft forever
3: sit0:
link/sit 0.0.0.0 brd 0.0.0.0
46. kill -Stop a process from runnin
#kill spamd
#kill -9
#kill -9 26711
47. less -Display output one screen at a
#less
#less /etc/named.conf
48. links -lynx-like alternative character mode WWW browser
#links www.google.com
49. local - Create variables
* can only be used in a function
50. locate -Find files
#locate squid
#locate *.doc
51.logout -Exit a login shell
#logout
52. logrotate - Rotates, compresses, and mails system logs
*rotate mail system logs and dependent to /etc/logrotate.d/
53. lpr -Off line print files
54. ls -List information about file(s)
#ls -al /home
#ls -halt /var
*list /var sorted by date.
55. make -Recompile a group of programs
*is used to maintain programs.
56. man -Help manual
#man ls
#man tail
57. mkdir -Create new folder(s)
#mkdir testfolder
58. mktemp -Make temporary filename (unique)
#mknod testfile
59. more -Display output one screen at a time
#more testfile
60. mount -Mount a file system
#mount /dev/sda1 /mnt/usbflash
#mount /home
61. mv -Move or rename files or directories
#mv testfile testfile1
#mv rondir /var/
62. nslookup -Query Internet name servers interactively
[root@rsc var]# nslookup
> set type=mx
> yahoo.com
Server: 83.229.64.10
Address: 83.229.64.10#53
Non-authoritative answer:
yahoo.com mail exchanger = 1 e.mx.mail.yahoo.com.
yahoo.com mail exchanger = 1 f.mx.mail.yahoo.com.
yahoo.com mail exchanger = 1 g.mx.mail.yahoo.com.
yahoo.com mail exchanger = 1 a.mx.mail.yahoo.com.
yahoo.com mail exchanger = 1 b.mx.mail.yahoo.com.
yahoo.com mail exchanger = 1 c.mx.mail.yahoo.com.
yahoo.com mail exchanger = 1 d.mx.mail.yahoo.com.
Authoritative answers can be found from:
yahoo.com nameserver = ns3.yahoo.com.
yahoo.com nameserver = ns4.yahoo.com.
yahoo.com nameserver = ns5.yahoo.com.
yahoo.com nameserver = ns6.yahoo.com.
yahoo.com nameserver = ns8.yahoo.com.
yahoo.com nameserver = ns1.yahoo.com.
yahoo.com nameserver = ns2.yahoo.com.
ns1.yahoo.com internet address = 66.218.71.63
ns2.yahoo.com internet address = 68.142.255.16
ns3.yahoo.com internet address = 217.12.4.104
ns4.yahoo.com internet address = 68.142.196.63
ns5.yahoo.com internet address = 216.109.116.17
ns6.yahoo.com internet address = 202.43.223.170
ns8.yahoo.com internet address = 202.165.104.22
>exit
63. passwd -Modify a user password
[root@rsc var]# passwd rcabusas
Changing password for user rcabusas.
New UNIX password:
BAD PASSWORD: it is WAY too short
Retype new UNIX password:
passwd: all authentication tokens updated successfully.
64. paste -Merge lines of files
#cat num1
1
2
#cat let2
a
b
c
#paste num1 let2
1 a
2 b
c
65. chage -Change user password expiry information
#chage -E YYYY-MM-DD
#chage -E 2008-01-01 rsc
66. ping -Test a network connection
#ping yahoo.com
#ping 198.6.1.2
67. ps -Process status
PID TTY STAT TIME COMMAND
1 ? Ss 0:02 init [5]
2 ? S 0:00 [migration/0]
3 ? SN 0:00 [ksoftirqd/0]
4 ? S 0:00 [watchdog/0]
5 ? S<>
6 ? S<>
7 ? S<>
10 ? S<>
11 ? S<>
1455 ? S<>
1908 ? Ss 0:09 syslogd -m 0
1911 ? Ss 0:00 klogd -x
1942 ? Ssl 0:00 /usr/sbin/named -u named -c /etc/named.caching-nameserver.conf -t /var/named/chroot
68.pwd -Print Working Directory
[root@rsc html]# pwd
/var/www/html
69.quota -Display disk usage and limits
70. quotacheck -Scan a file system for disk usage
*quota must be turn on to used its function
72. rm -Remove files
#rm -rf /home
#rm testfile
73. scp -Secure copy (remote file copy)
#scp projects.doc ron@192.168.1.1:
*projects.doc will becopied to /home/ron folder of 192.168.1.1 host.
74. shutdown -Shutdown or restart linux
#shutdown -h now (halt)
#shutdown -r now (reboot)
75. sort -sort lines text files
#sort testfile
*testfile alphabetically sorted
76. lynx -Command line browser
#lynx www.yahoo.com
77. touch -Create file timestamps
#touch testfilename
*same function as mktemp
78. usermod - modify a user account
#usermod -d /home/new/ron ron
79. useradd - create a new user or update default new user information
#useradd -d /home/user1 -C "User 1 Directory" user1
80. userdel - delete a user account and related files
#userdel -r user1
*it will delete all info associated with user1
Subscribe to:
Posts (Atom)